July 29, 2008

TWD: Summer Fruit Galette


Wow, is this a good recipe! This week's entry for Tuesdays with Dorie is Summer Fruit Galette, chosen by Michelle of Colorado Springs . You can find the recipe on her blog. And if you don't own the cookbook, I highly recommend going over there and printing that recipe out. And making it sometime soon. Like tomorrow. And then inviting me over. Did you know that I'm free tomorrow for tart-eating?

Almost any fruit will work in this galette, so I used two that were at the farmer's market last weekend -- apricots and blueberries. I seem to have a blueberry-buying problem, so it's no surprise that this had them in it. (I over-buy blueberries every week - not sure where this comes from. I was never denied blueberries as a child; in fact, we ate them often in the summer. Is it another Willie Wonka thing? All I know is that every week I'm trying to figure out how to consume all the berries in the fridge before they rot. I am eating an inordinate amount of blueberries - pints upon pints. Kittydad does not help in this antioxidant effort of mine, as much as I try to enlist him. So I'm on my own with an entire blueberry bush's output every week. And yes I do own a blueberry cookbook, but I always seem to forget I own it until after I've eaten the last berry. Then I say "Well, I'll just have to buy more blueberries next weekend and make xxx recipe!" Which recipe I then promptly forget about, leading to more blueberry-overflow the following week. Fortunately, blueberries do not have the same properties as asparagus - that would be weird.)

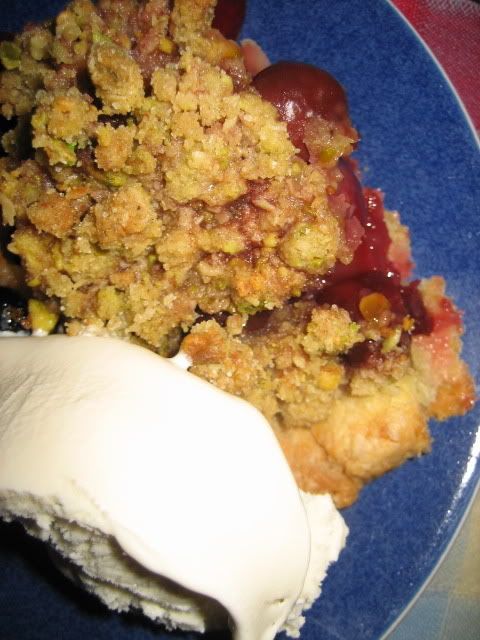
But, I digress. Since I had wanted a bit of almond in the Cherry-Rhubarb Cobbler last week, I decided to add a touch of almond extract to the custard. Like many other TWD bakers, I didn't use all of the custard called for in the recipe. I really should have saved it, though, because I may need to make this sucker again sometime soon. Like tomorrow.

I wish I had kept the fruit a bit more in the middle of the tart and had more sides to fold over and make it prettier - I'll remember that tomorrow, er, I mean, next time. I wanted mine to look more like Carla's.

But who cares, it tastes incredible. One thing I really like about this type of tart is that the fruit goes all the way into the corner of the crust, so you don't get a big hunk of just-crust at the end of the piece, like you do with pie. And because the filling is not as deep as a pie's, the bottom crust stayed nice and crisp.

I used strawberry jam on the bottom cuz that's what I had in the fridge, and I used the graham cracker crumbs. But, after I tasted the almond flavor, I thought that ground nuts would work well, too. Cooked apricots are super yummy, by the way. I'm so glad I caught the end of the season for this tart.

All in all, an outstanding tart and this is exactly why I joined TWD. Because I might never have tried that recipe on my own. I tend to avoid tarts and head straight for pies. Well, that won't happen....tomorrow!

July 28, 2008

GoGo Boots is Home!


(GoGo Boots & Pumpkin - reunited again!)

We were able to get GoGo Boots back inside the house on Saturday night. For those who might be curious, the only method that worked was as follows: We turned off all the lights in the house, opened the kitchen door and sat completely silent. We heard him rustling in the leaves on the side of the house and not more than 10 minutes later, he was inside. He came tearing in like a lightning bolt and ran upstairs immediately. His brother Pumpkin ran up after him and the two of them spent the next 24 hours curling up and washing each other. Pumpkin clearly missed his brother very much and was so happy to have him home. As are we, too!

The 2 days he was missing were one of the worst times in my life. I love this little boy so much and couldn't bear the idea that he was outside, all alone and scared. This is not a cat who was off exploring and adventuring. Our guess is that he was absolutely terrified - so scared that he didn't even respond to our calls because he was too afraid. We still don't know how he got out, but we just hope it never happens again! He has blisters on his poor little paws and has been sleeping most of the time. I don't think he slept a wink outside.

Welcome home, GoGo Boots!

July 24, 2008

My Baby is Missing


Hi everyone. Please send lots of good thoughts out into the universe to help us find our lost kitty, Go Go Boots. GoGo has not been outside since we rescued him 5 years ago, at age 3 months. Our cleaning woman was here today and although she says she never saw him get out, the only explanation is that he snuck out while she had the door open at some point. We have spent all evening combing the area for him. I am heartsick. He has never been alone in his whole life, as we also rescued his brother. They are inseparable. He is also a total mama's boy and follows me everywhere, sleeps with me, etc. I can't stop worrying about him out there all alone, with no food and no idea how to get back home.

I keep hoping he will just show up, and maybe he will by the morning, but it's so hard to think he may be gone forever.

Sorry for the depressing post but maybe if everyone thinks "go go boots come home", it might help.

Thanks.

July 22, 2008

TWD: Cherry Rhubarb Cobbler

(The cherries & rhubarb before it all went so wrong...)


(It looks promising coming out of the oven, doesn't it? Don't be fooled!)

I love cherries. I love rhubarb. I love cobbler. So the odds were high that I would also love this week's entry for Tuesdays with Dorie, Cherry Rhubarb Cobbler, chosen by Amanda of Like Sprinkles on a Cupcake .

But...I have to say...no love here for this one. Not even any "like" for this one.

Where to start...whole wheat flour in cobbler topping? Not a winner. I think the depth of the flavor fights with the fruit. Ginger in both filling and topping? I am a big fan of ginger, but with these fruits, not so much. I would have preferred a touch of almond extract or vanilla bean perhaps. My cobbler was also hobbled (hah) by slight under-cooking. I was mortified to realize, when serving it up, that the underside of most of the topping was still a bit raw despite 45 minutes of baking and looking golden brown on top. Maybe I was fooled by the naturally darker color of the whole wheat dough? The fruit wasn't fully cooked either. Oy. You really shouldn't have to chew rhubarb, it should just melt in your mouth. Undercooked rhubarb is pretty under-yummy.

And as for the look...well, I'm not sure why 20 blobs on a 8x8 square is a good idea. I would have done fewer blobs of dough, or rolled it out for a nicer look. The thing just looks sort of homely, don't you think? I mean, I know cobbler is a home-y dessert but still...it's just kinda sad looking.


(My homely homey cobbler)


Regardless, my family members ate every scrap on their plates -- dad even went back for seconds and wanted to keep all of the leftovers.

I know there were a lot of TWD bloggers who were not familiar with rhubarb before this recipe. I hope this doesn't turn them off forever -- instead, they (and everyone else) should try Dorie's Double Strawberry Rhubarb Crisp which is fantastic.

So, not a great report card today for TWD. I give it a C-.


And p.s., kittydad usually photoshops my sub-par photos but I am late getting this posted before deadline - maybe we'll fix them later (or not).

July 20, 2008

Believe the Hype!


YES! My days of searching for the perfect chocolate chip cookie recipe are over. That's right, folks, the cookie of my dreams made its debut in a New York Times article published two weeks ago. I am here to state emphatically that the cookie is awesome. Chewy on the inside, a bit crunchy on the edges and with something indescribable about the texture. The balance of flavors is just right and I don't think I've ever made, or eaten, a better cookie than one of these fresh from the oven.

Unfortunately, I fell down on the photography aspect. I took some really bad, unprintable shots of batter and didn't do much better with the finished product, aside from the one shot above. Note to self: keep reading that camera manual. With the next batch, I'll try to take more shots and add some to this post for an after-market upgrade.

And now, with no further ado, the recipe:

Perfect Chocolate Chip Cookies
Adapted from The New York Times and Jacques Torres

2 cups minus 2 Tbs non-rising cake flour
1-2/3 cups bread flour
1-1/4 tsp baking soda
1-1/2 tsp baking powder
1-1/2 tsp kosher salt
2-1/2 sticks sweet butter (1-1/4 cups), room temp
1-1/4 cups light brown sugar
1 cup plus 2 Tbs white sugar
2 large eggs, room temp
2 tsp vanilla extract
1 to 1-1/4 lbs bittersweet chocolate chips, chunks or feves
(minimum of 60% cacao content, best brand possible)
Optional: 1 cup chopped, toasted pecans or other nuts
Sea salt for sprinkling

1. Sift flours, baking soda & powder into a bowl. Whisk in the kosher salt. Set aside.

2. Using a mixer with paddle attachment, cream the butter and both sugars together until very light, at least 5 minutes. Add the eggs, one at a time, mixing well after each addition. Add vanilla on low speed.

3. On low speed, carefully add the dry ingredients and mix just until combined, 5-10 seconds. Don't worry if some flour isn't incorporated. Drop in the chocolate pieces and nuts (if using) and do a final blending with a rubber spatula. Make sure all flour is mixed in but don't over-mix.

4. Cover the dough well, pressing plastic wrap right on top of the dough and then also covering the bowl. Refrigerate for 24-48 hours, preferably at least 36 but no more than 48, for best results. Dough can be chilled up to 72 hours if necessary but will be best between 36-48 hours.

5. When ready to bake, preheat oven to 350. Set racks in oven to top and bottom thirds. Line 2 baking sheets with parchment paper, a non-stick baking mat or foil. Scoop out balls in whatever size you like (I use a 2-Tbs ice cream scoop). Press down slightly with palm to flatten a bit. Sprinkle lightly with sea salt and bake until golden brown, about 14 minutes, switching the sheets front & back and top & bottom half-way through for even baking. Do not overbake! The cookies should look a bit underdone when they come out, with very light golden bottoms. Let cool on trays for at least 5 minutes and then transfer to cooling racks.

For the original recipe, click here.

A few technical and not-so-technical notes:

1. The recipe calls for two kinds of flour that you might not have at home. I have not yet tried to make it with only all-purpose flour to see if it's the flour that counts. And unfortunately the article did not explain why exactly this combination of flours might make a difference. But I have to say that I'm not sure I want to mess with it -- I know it works. As for why, really, does it matter?? Just enjoy them.

2. The original also calls for Valrhona "feves" which I couldn't find, even at my local Whole Foods. The best price I found online is at Surfa's. I used Ghiradelli 60% bittersweet chips which are available at most grocery stores. I recommend using the best brand you can find.

3. I baked my first batch after 42 hours of resting time, then at 60 hours and again at about 80 hours. The first batch was definitely best and confirms what the original recipe states, that about 36 hours is ideal.

4. I ignored the part about making enormous cookies in the original recipe. They're just too big for normal eating, hard to pack up to give away and too much temptation for me.

5. I forgot to put the sea salt on my first batch and didn't really miss it. I think you could just put a smidgen more salt in the batter, or skip it. It's a nice touch, but even for a salt-lover like me, I didn't find it necessary.

6. The original recipe calls for 1-1/4 lbs of chocolate. I used just under a pound because I don't like too many chips in my cookies, and for me it was just right. But I know many people like more chocolate so use your own judgment.

7. I think pecans would be a nice addition if you like nuts in your chocolate chippers.

8. The resting time in the fridge is important. I have always chilled my chocolate chip cookie dough before baking, if I have time. Years ago, at one of my catering jobs, I asked the pastry chef why the cookies baked up chewy one day when they had been crispy the day before; she said if the dough was cold, the cookies would be chewier. She was right (of course) and the article explains the science behind why this is true. I will say that resting time alone does not create a chewy cookie, because I have made ones that were still too thin & crispy for my taste even after chilling but it's definitely one contributing factor.

If you're still with me at the end of this very long post, please let me know if you make the cookies and how they turn out! I'd love some feedback.

July 14, 2008

Take That, Bill Cosby!


Step away from the Jell-O box...

Yup, Dorie's chocolate pudding is darn good. This week's TWD recipe was chosen by Melissa of It's Melissa's Kitchen. You can find the recipe there. Full disclosure: I haven't made pudding from a box since I was a kid. In my 20's, it was all chocolate mousse, all the time because I had to be fahncy and frawnch about my cooking. Later on, I came to appreciate good old fashioned desserts and made a slew of chocolate puddings, rice puddings, tapioca puddings, butterscotch puddings...you get the picture. So for the last 5 years or so, my standard chocolate pudding has been the one in Richard Sax's Classic Home Desserts. Dorie's recipe is almost identical in terms of ingredients & proportions, with the one difference being bittersweet chocolate instead of semisweet -- a great improvement. And of course there's her use of the food processor, which is a tad messy but makes an exceptionally smooth pudding.

The recipe is really easy so I don't have much to say about the process. The result is super yummy, rich, smooth, and everything a chocolate pudding should be.

We tried it first with unsweetened creme fraiche, as per Dorie's suggestion. But neither one of us was crazy about it. Kittydad said it was too sour in contrast to the sweet pudding, and I had to agree, as much as I love creme fraiche. It's better either just as is or with lightly sweetened whipped cream with a touch of vanilla added. I put on some cacao nibs to disguise my messy spoon-blobbing method of topping with whipped cream, as I was too lazy to get out the pastry bag. This adds a nice crunch but they also tend to be fairly bitter so I'm not sure I'd do it again.

Between the pudding and the NY Times chocolate chip cookies that I also made this weekend, I'm feeling a wee bit over-chocolatified and am looking forward to next week's cherry rhubarb cobbler challenge. I'll be posting about the cookies soon, but let me just say that you should get that dough in your fridge soon if you want to taste a bit of cookie heaven!

July 13, 2008

Clafoutis Craving Foiled

Bummer. I tried the cherry clafoutis recipe from Elizabeth Prueitt's Tartine cookbook and it was a disaster. I should have known not to trust it when it didn't say to strain the creme anglaise mixture - not that that was the error but it's a sign of bad recipe writing. One mistake I may have made was to add a few extra cherries - probably too many created too much liquid in the batter.

Her suggestion to top with tons of sugar (1/4 cup!) and then caramelize in 500 degree oven didn't work at all for me. Maybe that works in a professional convection oven or under a salamander but not in my household maytag. I kept waiting for it to caramelize and probably overcooked it. Anyway, the inside came out like warm creamy scrambled eggs with overly sweet cherries. Not the silky smooth custard I had in mind. I hate when this happens, especially when I waste a whole pint of perfect farmer's market cherries.

I'm so mad at the damn thing I'm not showing you any pictures, so there!

I was so craving clafoutis and now I have to try another version at some point to figure out what I should have done to make it work. I think next time I'll try Sweet Melissa's version since she never steers me wrong.

This was my first recipe from "Tartine" and I was soooo looking forward to it. Sigh.

Anyone out there have a good clafoutis recipe for me?

A Perfect Scone


Have you ever tasted the scones that are sold in crappy delis or bakeries? You know the ones I mean, the hard, dry hockey pucks that bear no resemblance whatsoever to their namesake? I don't know where those abominations came from. I started noticing them years ago when they cropped in the corner produce markets all over Manhattan. Blech. For some reason, I always held high hopes for those ready-to-eat scones, envisioning them melting in my mouth like the ones I had had in England and Ireland. Instead, you would end up with what felt like volcanic ash lining your mouth and a cannonball in your stomach.

Forget those imposters. Homebaked scones are the way to go. And they're really easy to make, contrary to what you might think. I make a batch almost every weekend as they are my favorite breakfast baked treat. I love scones because they are not too sweet and are less cake-like than muffins. You can reduce the sugar to almost nothing in the recipe and they still taste good, allowing you to eat with jam if you like. Despite my irrepressible sweet tooth, I happen to like non-sweet things for breakfast. This usually shocks anyone who knows me well. For some reason, sugary sweets on an empty stomach just doesn't work for me. So, scones...

I've tried a lot of recipes but my new standby is one from The Sweet Melissa Baking Book. Melissa adds finely ground oats, which I think makes a big difference. She uses heavy cream instead of buttermilk - you could probably sub in buttermilk for a lower fat version (or to skip a trip to the market), but I haven't tried that yet. She also likes to add orange zest for a little zip.

I didn't have any oranges to zest this past Sunday and was starting to regret that as I wanted to make fresh blueberry scones and orange-blueberry is a great combination. But I decided to add cinnamon and I'm happy to report it worked well.

As with pie dough, it's key to keep everything cold, and you'll see my notes below on that.

Here is what kittydad and I enjoyed this weekend:

Cinnamon Blueberry Scones
Adapted From The Sweet Melissa Baking Book

8 Tbs (1 stick) unsalted butter, very cold
2/3 cup whole old-fashioned oats
1.5 cups flour (chilled if possible)
2 tsp baking powder
1/2 tsp kosher salt
1-2 Tbs sugar
1/4--1/2 tsp cinnamon
2/3 cup heavy cream, cold
1 large egg, cold
1 cup blueberries

For the glaze:
2 Tbs heavy cream
1 Tbs cinnamon-sugar

Line one or two cookie sheets with parchment, foil or a silpat.

Cut the butter into 1/2 inch pieces. Put in freezer to chill for at least 10 mins, or while you prepare the dry ingredients.

Put the oats in food processor with metal blade. Pulse to a coarse flour.
Add the flour, baking powder, salt, sugar and cinnamon. Pulse to combine.
Add the chilled butter and pulse until the butter is the size of peas.
I put this mixture in the freezer for about 10 mins at this point, but that's optional.

In a medium or large bowl, whisk together the cream and egg until smooth. Fold in the berries.

With a rubber spatula, fold the flour-butter mixture into the egg mixture to combine. The dough should just barely hold together. Don't overmix and don't worry if it looks a tad dry, as long as you can (gently) squeeze it together to form a ball.

Turn the dough onto a lightly floured board or counter and pat into a flat round disk about 7 inches in diameter. It's okay if the edges look crumbly. Scones don't need to be perfectly smooth and you don't want to over-work the dough.


Using a sharp knife, cut the disk into 6, 8, or 10 triangles. (Melissa says 6 but that makes huge scones. I like 8, or 10 if you want them smaller).


At this point, I like to put the scones on a baking sheet and freeze for at least 30 mins before baking. If you don't have time, then go ahead and proceed with baking as below. (Alternatively, you can flash-freeze them for a few hours, then wrap in saran and bake another day).

Brush tops and sides of scones with the heavy cream and sprinkle generously with cinnamon-sugar. Bake in a pre-heated 350 oven for about 30 minutes, until light golden on top and bottom.

Cool on rack. Best if eaten warm, of course!


07.20.08 Update: I made these with buttermilk instead of heavy cream this weekend and they were just fine. A bit less rich and maybe a teeny bit healthier. There's definitely a difference in taste but not so much as I thought and the lower-fat content is probably a good thing.

July 9, 2008

Chocolate Factory Weekend


Melissa from It's Melissa's Kitchen has chosen Chocolate Pudding for this week's TWD challenge. Yum. I haven't made Dorie's version yet so I'm looking forward to making it this weekend.

And you KNOW I'll be making these as soon as I can get my hands on some bread flour.

July 7, 2008

Tuesdays with Dorie: A Tale of Two Pies

This week's challenge from Tuesdays with Dorie is Double Crust Blueberry Pie. I actually made this pie the week before last - one week before I decided to join the group and start my blog. It was this coincidence that finally convinced me to become a TWD baker. So, I don't have any photos of my blueberry pie, but I can certainly describe the experience.

I have long had a love-hate relationship with making pies. I love pie. I adore pie. I covet pie. I lust for pie. Especially warm fruit pie with ice cream. And while a cobbler or crisp gives you essentially the same flavor, there is something iconic about pie that makes it even more deeply soul-satisfying. Being able to bake a perfect pie has been a holy grail for me for a long, long time.

But pie crust is a bitch. It's moody, unpredictable, overly sensitive, uncooperative and messy. I have thrown out more pie doughs than I care to admit. I have sworn off pies forever, only to find myself back in the kitchen a few hours later, pounding the rolling pin on the counter once again. Because I NEED to make pie. As much as it bedevils me, I can't stay away from it. Sometimes I manage to roll out a crust without too many tears and curses, but most times it's ugly in the kitchen when I'm making a pie.

So...back to the blueberry pie. This crust unfortunately fell into the maddening category. It was tough to roll out, cracking badly on the edges and falling apart when I transferred it into the pan. As soon as it started to bake in the oven, the darn thing seemed to fall apart, like it was melting. The crimps drooped and some just fell right off the pie plate and onto the sheet pan. Aaagh! This has happened in the past - why, why, why?? My crimps were perfectly perky before going in the oven and the end product looked like I had just thrown a bunch of dough at the wall and let it slide down onto the berries.

In the end, the pie tasted fine and my guests loved it. The filling was sweet but not too sweet and nicely balanced. I added a sprinkling of cinnamon but would add more next time as it wasn't noticeable. The crust was buttery and yummy. But still, I was not happy with how my crust had rolled out and I wanted my crimps to stay put, not melt off the pie plate.

This weekend, I made another batch of pie dough. And I am happy to report that some new techniques I used made a HUGE difference. Rather than ending up frustrated and cursing up a storm, I actually enjoyed rolling out the crusts. Success at last! I could hardly contain my glee. So, here is what I learned:

1. I used the food processor to blend in the butter. I always make sure everything is cold -- the flour, the butter, the metal blade. In the past, I think I under-blended the butter and ended up with some very large chunks of fat. This probably meant that some of the flour wasn't "touched" by fat and therefore too dry. It may also be why the crust seemed to melt in the oven. So, this time I pulsed a bit longer so that the butter was tiny little pea-size pieces.

2. I added water - about 7 Tbs in all - and pulsed until the mixture looked like dry cottage cheese curds. Another problem I have always had in the past is that I seemed to need so much more water than the recipe called for and I would end up with a dough too wet and then tough after baking. I think I under-pulsed so that the water I added didn't have a chance to evenly distribute. This time I just pulsed a bit more after adding the initial 6 Tbs, then added the extra drops when I thought it really did need it. Next time, I might be more brave and keep pulsing rather than adding more water. I'm just always afraid of over-working the dough but I think excess water might be a bigger risk.

3. After squeezing the dough into 2 balls, I patted it out into a fat disk, wrapped it with saran and then patted it out AGAIN into a much larger, flatter disk - about 5 inches in diameter. I have never made the disk this big before. Then I chilled it for a few hours. When I started to roll it out, I found it was much easier because the dough was fairly flat already. I didn't have any cracking in the middle and much less on the edges.

4. I used a vinyl pastry bag to roll out my dough. I had bought one many months ago on Dorie's recommendation but never pulled it out of the drawer. I don't know why but I had looked at it and thought it looked strange so I just shelved it. This time, I figured I needed to change my methods and would give it a whirl. Holy cow! What a revelation! I love the thing. It totally made rolling much easier - I could better control the shape to ensure it was round. There is less mess on the countertop as you don't have flour flying all over and the rolling pin doesn't stick. My new friend the vinyl pastry rolling bag, you must meet her! You can buy one here.

5. Instead of rolling with my hands on the rolling pins' handles, I put my hands on the barrel itself and put my full weight into it. I used fewer strokes and the rolling went much faster. Another revelation - why was I holding those handles all this time??

I made a gorgeous cherry pie with pistachio crumb topping. Unfortunately, I didn't get many good pictures of either the process or the pie (still working on my camera skills!). But it was deeelicious and a great ending to our dinner with friends in the Hudson Valley. Thanks to my good friends A. and R. for hosting such a great night with good food, good wine and lots of laughs.

Yes, I did pit all the cherries myself:


And here is one of the only shots I managed to get of the finished product:


So, those are today's pie making tips. Sorry for the long post but I had a lot to tell you folks!

July 6, 2008

Fast, Cheap & Out of Control


Well, it's all true except for the cheap part. Nothing with fresh berries in it is cheap. But I couldn't resist using that title for a post.

You want dessert fast? You want it out-of-control good? I got it right here for ya.

Here's what you need:
Pound Cake: homemade, store-bought, fresh or stale
Chocolate Sauce: your own, Hershey's or a fancy gourmet brand
Berry Sorbet: I like Haagen Dazs raspberry but any one will do
Fresh Berries: any kind you like, a mix of 2 or 3 is nice for color but not mandatory
Mint Sprig: optional, only if you want to really impress them

What is fast about a dessert with 5 elements on the plate, you say? Well, okay, it's only fast if you happen to have all of those things in the house. But with some advance shopping, you can bang out a photo-worthy dessert in just a few minutes.

I wanted a dessert for July 4th that only involved minimal baking as I was making pies for a July 5th party as well. I wanted it colorful and to include fresh berries which are so amazing at the farmer's markets right now.

I couldn't remember the last time I made a plain pound cake. Banana bread; zucchini bread; pumpkin bread -- those loaf cakes are regulars at our house. But plain, buttery pound cake had somehow escaped me for years. I used a recipe from The Sweet Melissa Baking Book. It was good, but I'm not sure I'd make it again. But in this dessert, it really doesn't matter where you get the pound cake from.

I happened to have some leftover hot fudge sauce in my freezer, but again, you can just buy some. Then you pick up some berry sorbet and fresh berries.

When you're ready to serve dessert, toast slices of pound cake. Drizzle warm chocolate sauce on the bottom of the plate, top with a slice of cake, followed by a scoop of sorbet and toss a handful of berries on top. Sure, add the mint sprig if you have it growing in your garden or happen to have in the fridge. Oh my god, you have just created a restaurant dessert in your own home. And it tastes as good as it looks, seriously. Let's take another look at mine, just to tempt you again:


(I am hereby using the Benetton/Gap theory of marketing...show the people the same thing over & over and eventually they will need to own it -- do you need to see it again? Just scroll back up to the top and keep staring at it...you're getting sleepy...you're getting sleepy...you're taking out the loaf pan...you're softening up the butter...you're rinsing berries....there you go, you're on your way to dessert stardom in your own home....)

Hot Potatoes on a Stick!


For those of you who have outdoor grills and are not confined to cooking indoors in the summer, you really must try one of my new favorite side dishes: grilled potato skewers, or as I like to call them, hot potatoes on a stick.

This works best with a real charcoal grill using natural wood charcoal, but it can also be done over gas or regular coals. I am a purist about my charcoal but I know from experience that my diatribes about the quality of charcoal or gas vs. coals, do not create converts. So do as you please with what's under the grates, but you should try this the next time you want spuds with your burgers.

Take a bunch of small potatoes - fingerling, red, baby yukon gold, whatever you like. Cut them in half lengthwise so that you have one flat surface.


Put the taters in a pot of cold salted water to cover, bring to boil and cook until just al dente - a fork should be able to go through the center easily but they should not be completely tender. Drain. You can do this earlier in the day and just keep them at room temp or refrigerated until ready to grill.

Next, toss the potatoes in a bowl with a good dose of olive oil, a handful of chopped garlic, plenty of kosher salt and pepper. The potatoes should be slick with oil and well-salted. Herbs are optional.

Then put the spuds on long, 12" skewers, about 3 per skewer - thread them on so that they will lie flat.


Heat up your grill and lay the skewers so that the potatoes' flat side is down. I like to start them over direct flames so that they get crisped up but if you are using that side of the grill for something else, it really doesn't matter. Since the potatoes are mostly cooked already, you are just finishing them off and getting some crispiness and grill flavor. Use tongs to carefully flip the skewers, grill a little bit on the other side and then serve hot or at room temp.

Pass them out on the skewers or drop them back in the bowl you used to toss them with the oil to serve on the table. Crispy on the outside, creamy on the inside, smokey all the way through...mmmmm....

July 1, 2008

Well, hello there. Welcome to my new blog. I never thought I would do this. I have fought the impulse numerous times. But finally I have caved and here I am, a blogger. Yikes!

What finally got me to this point is my overwhelming desire to participate in Tuesdays with Dorie.. I've been baking from Dorie Greenspan's book, Baking, for almost a year and I find it hard to resist any of the recipes. Then I found out that a group of nearly 200 bakers bake from the book every week and post the results on their blogs. I said to myself, "Internet-alter-ego Kittymama, you really should be doing that too!" And Kittymama said, " Myself, you are so right." So here I am.

So now that you know my motivation for the blog, you may be wondering where the name Kittymama comes from. Actually if you know me, you know about the cats. The cats, the cats, the cats. Kittydad (also known as my husband) and I are nuts about our kitties. We have 4 who live inside with us: Gonzo, GoGo Boots, Pumpkin and Merlin. Yeah, 4 is a lot. We know we're crazy. No, we will never have scratch-free furniture. Yes, we have 3 litter boxes and the staff at PetGoods run to re-stock the shelves when they see Kittydad walk in. But we love them dearly and they all needed homes. We also have 2 semi-feral cats who live in our backyard & garage: Belle and Velvet, a mother-and-son team. Yeah, that makes 6. We know. We know. But hey it's our house -- do what you want in yours, okay?

I took on the moniker Kittymama when I joined a chat board for people adopting from China. Kittydad and I have just started the process to adopt from China, after spending a year in line for another country that recently closed. We have mountains of paperwork to complete - again! - but the cats need another human to boss around, don't you think?

Blogging is HUGE in the adoption world. I can't decide yet how much stuff, if any, about our adoption I will put on the blog but I'll probably post occasional updates and use it for a travel journal when the time comes.

So here we go. Hope I don't bore you (or myself). Let's see what I can cook up...

kittymama